Add 3rd party OSDP reader to a registered CoreStation.
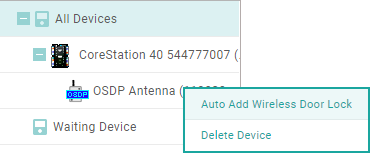
| 2) | Right-click on the name of a CoreStation and click Add OSDP Device. |
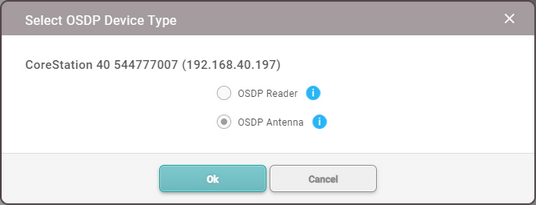
| 3) | The Select OSDP Device Type window appears. Select OSDP Reader. |
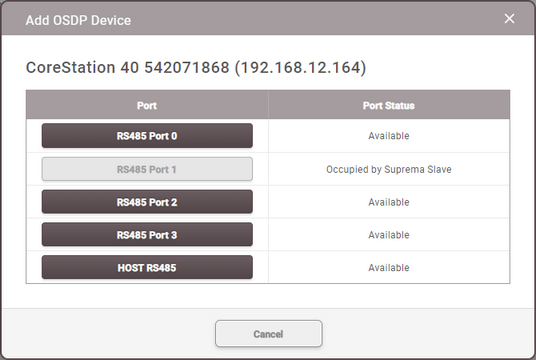
| 4) | A list of ports appears. Among the ports whose Port Status is Available, select the port to add the OSDP reader. |
 Note Note
| ▪ | Connect up to 2 units per port on CoreStation, for a total of 8 units. |
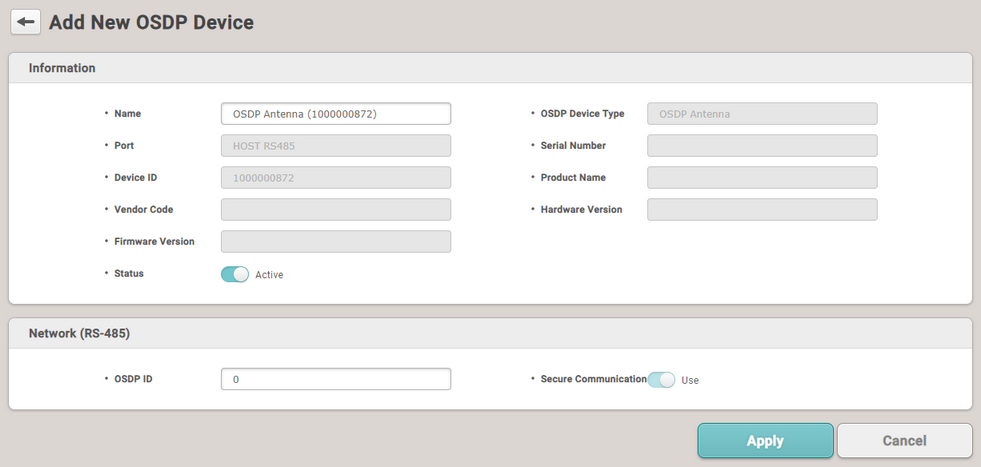
| 5) | Set the Information, Network (RS-485), and Authentication. |
|
|
|
Information
|
| ▪ | Name: Enter a device name. If not entered, it will be assigned automatically. |
| ▪ | Status: Set the reader status. If set to Inactive, CoreStation will not communicate with the OSDP reader. |
|
Network (RS-485)
|
| ▪ | OSDP ID: Enter the address of the OSDP reader. Enter a number between 0 and 126. |
| ▪ | Secure Communication: Communication between CoreStation and OSDP readers can be protected with an SCB key.
When Secure Communication is set to Use, CoreStation sends the SCB key to the OSDP reader. OSDP readers can use this SCB key to send and receive data to and from CoreStation through a secure channel. |
|
Authentication
|
| ▪ | Auth Mode: You can configure the authentication modes of the OSDP reader. BioStar 2 can use combinations of card and PIN as authentication modes. |
Note
| ▪ | Click + Add and create an authentication mode by dragging and dropping available options. Select a schedule and click OK to register the authentication mode. If no desired schedule is available, click + Add Schedule to create it. |
| ▪ | For more information on configuring schedules, see Schedule. |
| ▪ | Full Access: You can grant full access to users registered within the OSDP reader without setting any access groups. |
| ▪ | Auth Timeout: When using a combination of multiple credentials in Auth Mode, the system waits for this length of time to authenticate the second credential.
Set a timeout period for authenticating the second credential after authenticating the first credential. If the second credential is not input within this time, the authentication fails. |
|
| 6) | Click OK to register the configured OSDP reader. |
Note
| ▪ | Set the LED/Buzzer behavior of the connected OSDP reader. For detailed configuring of the OSDP Device LED/Buzzer, refer to OSDP Device LED/Buzzer. |
|