You can edit detailed settings of registered CoreStation.
| 2) | Click a CoreStation on the device list to edit.. |
| 3) | Edit the necessary items. |
|
|
|
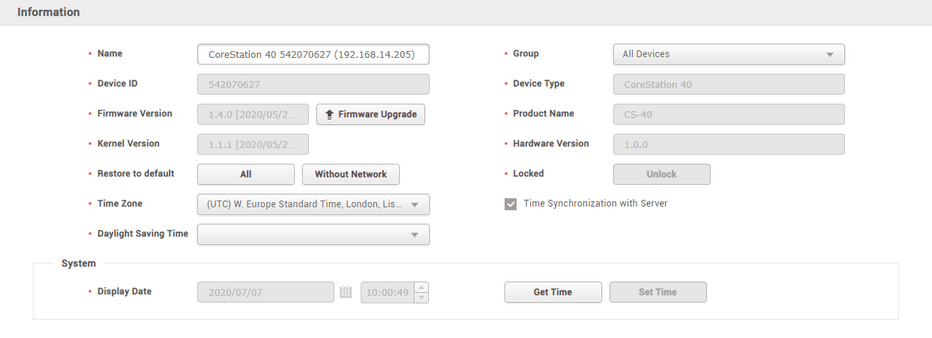
Information
|
| ▪ | Name: Enter a device name. |
| ▪ | Device ID: View the device ID. |
| ▪ | Firmware Version: Click Firmware Upgrade to install a newer firmware version. |
| ▪ | Kernel Version: View the kernel version. |
| ▪ | Restore to default: Reset the settings of the device. Click All to reset all settings. Click Without Network to reset all settings excluding the network settings. |
| ▪ | Time Zone: Set the time zone of the device. You can set a different standard time zone of the device from the time zone of the BioStar 2 server. |
| ▪ | Daylight Saving Time: Apply the daylight saving time to the device. To add a new daylight saving time rule, see Daylight Saving Time. |
| ▪ | Device Type: View the device type. |
| ▪ | Product Name: View the model name. |
| ▪ | Hardware Version: View the hardware version. |
| ▪ | Locked: Unlock button will be available when the device is disabled via Trigger & Action. |
| ▪ | Time Synchronization with Server: Select the option to synchronize the time information of the device with the server. |
|
System
|
| ▪ | Display Date: Click  to manually set the date and time. If the Time Synchronization with Server option is selected, the date and time cannot be selected manually. to manually set the date and time. If the Time Synchronization with Server option is selected, the date and time cannot be selected manually. |
| ▪ | Get Time: Click the button to fetch the time set in the device. |
| ▪ | Set Time: Click the button to apply the time set in BioStar 2 to the device. |
|
|
|
|
|
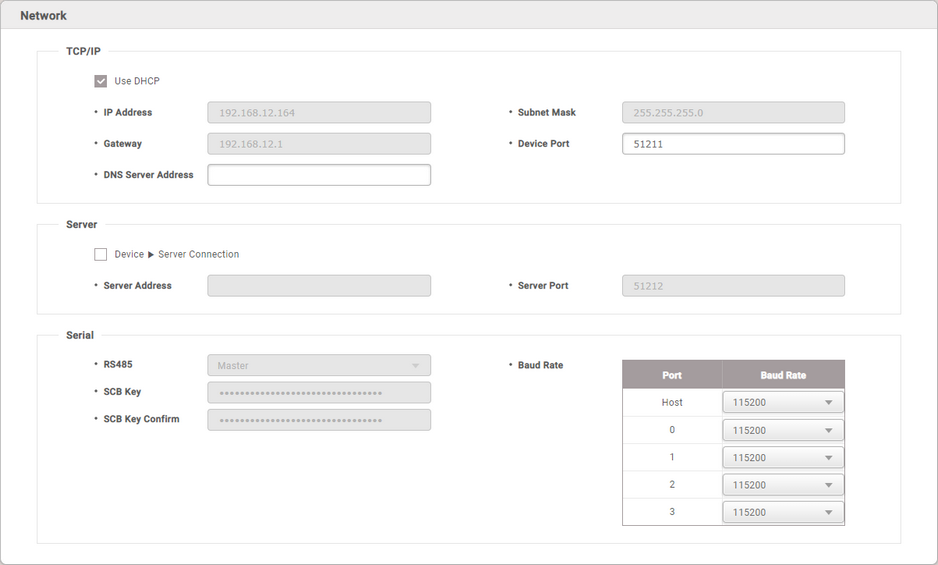
TCP/IP
|
| ▪ | Use DHCP: Select this option to allow the device to use a dynamic IP address. If this option is selected, network settings cannot be entered. |
| ▪ | IP Address, Subnet Mask, Gateway: To assign a fixed IP to the device, enter the information of each network. Uncheck Use DHCP and enter the information. |
| ▪ | Device Port: Enter a port to be used by the device. This port is used for the communication between BioStar 2 and the device. |
| ▪ | DNS Server Address: Enter a DNS server address. |
|
Server
|
| ▪ | Device → Server Connection: Select this option to configure the BioStar 2 settings for connecting to the devices. If this option is selected, BioStar 2 server network settings can be entered. |
| ▪ | Server Address: Enter the IP address or domain name of the BioStar 2 server. |
| ▪ | Server Port: Enter the port number of the BioStar 2 server. |
|
Serial
|
| ▪ | RS-485: You can only use Master. |
| ▪ | Baud Rate: Set a baud rate of the RS-485 connection. |
| ▪ | SCB Key: Set the SCB key of the device. This feature is active only when there is no RS-485 device connected to the CoreStation. |
| ▪ | SCB Key Confirm: Make sure it matches the SCB key you set. This feature is active only when there is no RS-485 device connected to the CoreStation. |
 Note Note
| ▪ | The SCB Key can be entered up to 16 bytes. |
|
|
|
|
|
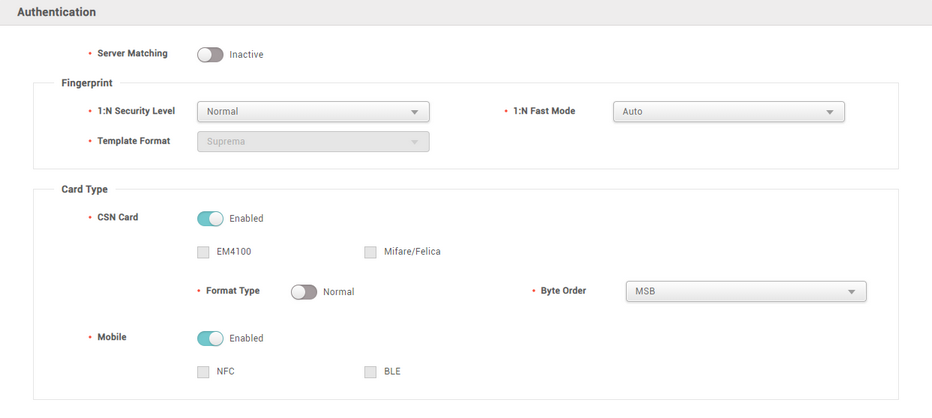
Authentication
|
| ▪ | Server Matching: It is possible to set server matching. When Active is set, the authentication is carried out using the user information stored in the PC where BioStar 2 is installed, and when Inactive is set, the authentication is carried out using the user information stored in the device. When using server matching, the server matching of BioStar 2 should be also activated. For more information, refer to Server. |
|
Fingerprint
|
| ▪ | 1:N Security Level: You can set a security level to use for fingerprint or face authentication. The higher the security level is set, the false rejection rate (FRR) gets higher, but the false acceptance rate (FAR) gets lower. |
| ▪ | 1:N Fast Mode: You can set the fingerprint authentication speed. Select Auto to have the authentication speed configured according to the total amount of fingerprint templates registered within the device. |
| ▪ | Template Format: You can view the fingerprint template format. |
|
Card Type
|
You can set the type of card used by the device.
Note
| ▪ | The type of card supported by the device is displayed. |
| ▪ | CSN Card: You can select the CSN card and format type and set the byte order. |
Note
| ▪ | If Format Type is set to Nornal, the device will read the card serial number (CSN). If the option is set to Wiegand, the device will read the card serial number in a Wiegand format that the user has defined. |
| ▪ | If Format Type is set to Wiegand, you can select the Wiegand format to be used in the device. To set a new Wiegand format, refer to Wiegand. |
| ▪ | When Byte Order is set to MSB, the device reads a card ID from the highest byte to the lowest byte. For example, the highest byte of the card ID 0x12345678 is 0x12 and the device sequentially reads 0x12, 0x34, 0x56 and 0x78. When the option is set to LSB, the device reads a card ID from the lowest byte to the highest byte. |
| ▪ | Mobile Card: You can set the type of mobile card. |
|
|
|
|
|
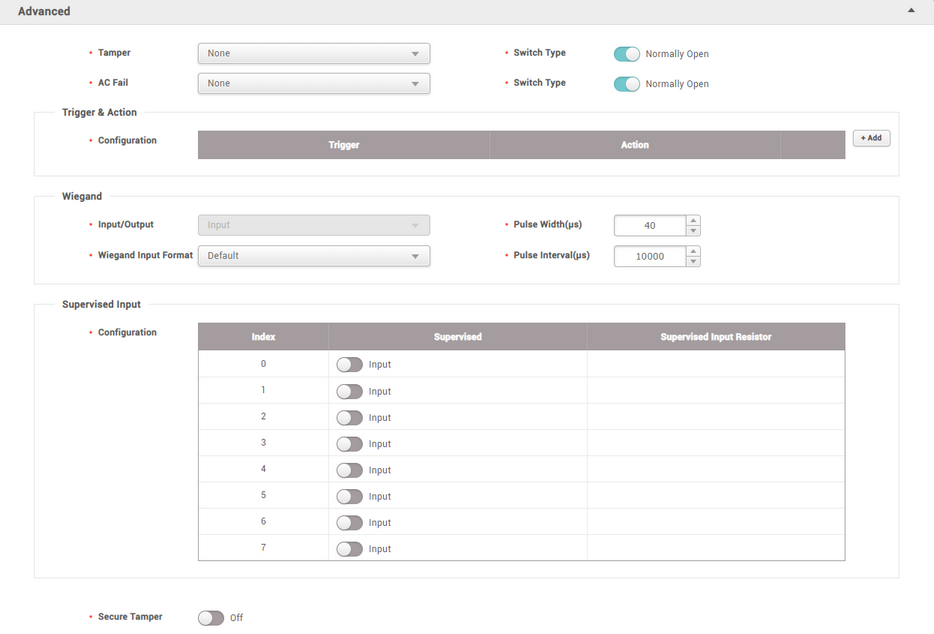
Advanced
|
| ▪ | Tamper: You can set the AUX port where the tamper is connected. |
| ▪ | AC Fail: You can set the AUX port that monitors the power input signal. |
|
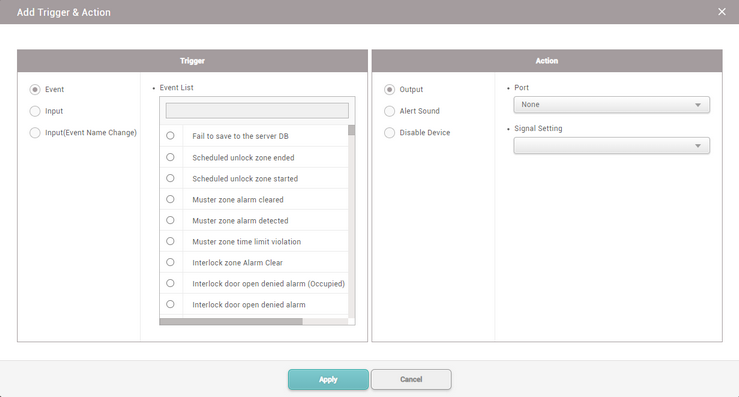
Trigger & Action
|
| ▪ | Configuration: You can set the operation of the device according to a pre-defined alarm or signal input. For example, you can set to output a signal set by the user or not to use the device when a temper on signal occurs in CoreStation. |
|
Wiegand
|
| ▪ | In/Out: You can only use input mode. |
| ▪ | Input Format: You can set a format for Wiegand. For more information on setting a Wiegand format, see Card Format. |
| ▪ | Pulse Width: You can set the pulse width of the Wiegand signal. |
| ▪ | Pulse Interval: You can set the pulse interval of the Wiegand signal. |
|
Supervised Input
|
You can set the supervised input port of CoreStation to be used as TTL input port and set a resistance value to be used for supervised input. 1㏀, 2.2㏀, 4.7㏀ and 10㏀ can be set for the resistance value.
|
Secure Tamper
|
If a tamper event occurs on the device, you can set to delete the entire user information, the entire log, and the security key stored on the device.
|
|
|
|
|
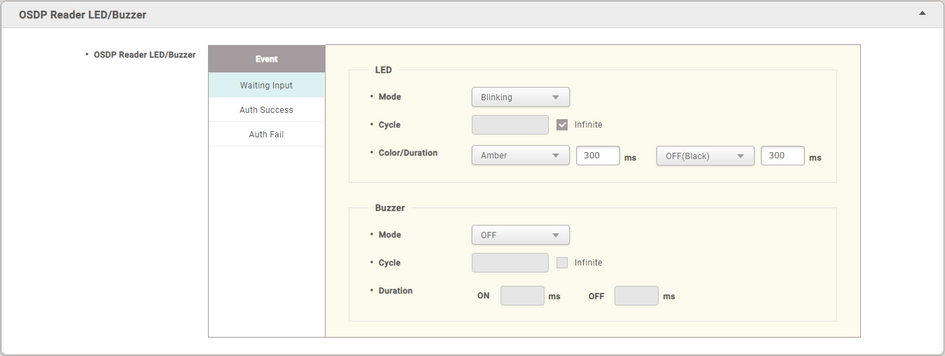
OSDP Reader LED/Buzzer
|
When an event occurs in all OSDP readers connected to CoreStation, LED and buzzer operations can be set collectively.
Note
| ▪ | If the OSDP reader connected to CoreStation does not support LED and buzzer, it may not operate as set. |
|
LED
|
Sets the LED operation when Waiting Input, Auth Success, and Auth Fail events occur.
| ▪ | Mode: Set the desired operation among OFF, Constant, and Blinking. |
| ▪ | Cycle: When Mode is set to Blinking, enter the number of LED blinks. Check Infinite to continuously repeat the set Mode. |
| ▪ | Color/Duration: When Mode is set to Blinking, select two colors to blink at the set repeat count and enter Duration.
When Mode is set to Constant, select one color to indicates and enter Duration. |
|
Buzzer
|
Sets the buzzer operation when Waiting Input, Auth Success, and Auth Fail events occur.
| ▪ | Mode: Set the desired operation among OFF, Constant, and Beeping. |
| ▪ | Cycle: When Mode is set to Beeping, enter the number of buzzer plays. Check Infinite to continuously repeat the set Mode. |
| ▪ | Duration: When Mode is set to Beeping, enter the duration for the buzzer to be plays at each set repeat count.
When Mode is set to Constant, enter the duration for the buzzer to be plays. |
|
|
| 4) | Click Apply to save the settings. |
