BioStar 2 supports a 32-bit operating system and a 64-bit operating system. Check the system type of your PC where BioStar 2 is to be installed and carry out its installation accordingly.
 Note
Note
| ▪ | Installation files for 32-bit operating systems are not provided from BioStar 2.9.2. |
| ▪ | Do not install BioStar 2 on a PC where BioStar 1 is installed. This may cause performance problems. |
| ▪ | If BioStar 2.3.0 is installed on top of a BioStar 2.2.1 or 2.2.2 installation, all information stored in the SQLite database is migrated to a new MariaDB database. |
| ▪ | Upgrading directly from the existing version to the latest version is possible from BioStar 2.6.0 or higher. If the installed version is lower than 2.6.0, installing all versions in a correct sequence until reaching version v2.6.0 is essential. |
|
|
|
2
|
2.2.1 > 2.3 > 2.4 > 2.4.1 > 2.5.0 > 2.6.4 > Latest Version
|
2.2
2.2.1
2.2.2
|
2.3 > 2.4 > 2.4.1 > 2.5.0 > 2.6.4 > Latest Version
|
2.3
|
2.4 > 2.4.1 > 2.5.0 > 2.6.4 > Latest Version
|
2.4
|
2.4.1 > 2.5.0 > 2.6.4 > Latest Version
|
2.5
2.6
|
2.6.4 > Latest Version
|
2.6.4 or higher
|
Latest Version
|
| ▪ | If you are using MS SQL Server, set the Collation option of the server and each table to CI (Case-insensitive). |
| ▪ | When backing up a database from an older version of BioStar 2, disable all services and procedures. Furthermore, if you do not back up and restore the AC database and the TA database together, you will not be able to use the TA database. |
| ▪ | If you want to back up the database of BioStar 2, be sure to also back up the enckey in the \Program Files\BioStar 2 (x64)\util folder and the system.conf and setting.conf file in the \Program Files\BioStar 2(x64) folder. Otherwise, the database will be unavailable. |
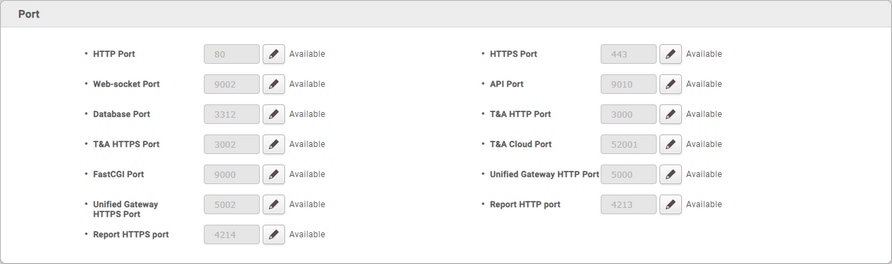
| ▪ | The default values for the ports used by BioStar 2 are as follows. If another program occupies the same port, BioStar 2 may not work properly.
 |
If you use a database configured by the user directly, check the following items before installing BioStar 2.
| ▪ | Open the my.cnf file and then change some configurations under [mysqld] as shown below. |
character-set-server=utf8
collation-server=utf8_unicode_ci
max_connections = 600
|
| ▪ | Open the my.cnf file and then add some configurations under [mysqld] as shown below. |
log_bin_trust_function_creators = 1
group_concat_max_len = 102400
|
| ▪ | Access MariaDB with the root permission and execute the following command. |
> GRANT SUPER ON . TO user_id@'localhost' IDENTIFIED BY "password";
> GRANT SUPER ON . TO user_id@'%' IDENTIFIED BY "password";
|
|
Note
| ▪ | All database and tables should set the Collation as CI(case-insensitive). |
Setting the port
| a) | Run SQL Server Configuration Manager and set TCP/IP Protocol for Protocols for SQLEXPRESS to the desired port number. |
| b) | Restart SQL Server Services to apply the settings. |
Creating the user and database
| a) | Log in to the sa account using SQL Server Authentication in SQL Server Management Studio. |
| b) | Right-click on Security and click New Login. |
| c) | Enter the desired name in the Login Name field and select SQL Server Authentication. |
| d) | Enter the desired password in the Password and Confirm password field, and then uncheck the Enforce password policy. |
| e) | Click OK to save the settings. |
| f) | Right-click on Database and click New Database. |
| g) | Enter the desired name in the Database Name field. |
| h) | Enter the login name in the Owner field. Use the login name set in step c). |
| i) | In the Database Files section, we recommend that set the Initial Size (MB) to 3000 and set the Autogrowth/Maxsize to By 10 MB, Unlimited. |
Setting the Windows Authentication database
1. Presetting
If you are using Microsoft Windows Active Directory, complete the presets as below before setting up the Windows Authentication database.
| a) | Log in to SQL Server Management Studio with an administrator account. |
| b) | Right-click on Security and click New Login. |
| c) | Select Windows Authentication and click Search. |
| d) | In the Select a user or group window, click Location, then select the Active Directory path and click OK. |
| e) | Enter the user name in the object name field, then click Check Names > OK. |
| f) | Click Server Roles in the Select a page. |
| g) | Select sysadmin and click OK. |
| h) | Click User Mapping in the Select a page. |
| i) | Select ac, master, ta, ve and set the Default Schema to dbo. |
| j) | Click OK to save the settings. |
2. Settings to use MS SQL Windows Authentication with Active Directory account
| a) | Run services.msc and log in as a domain user by selecting Specify account in the MSSQL DB's Properties > Logon. |
| b) | Add port 1433 as an exception to your Windows firewall. |
| c) | Create an empty ac, ta, ve database in MS SQL with sysadmin authentication. |
| d) | Enable Windows Authentication for domain users in MS SQL and assign all permissions except sysadmin to the ac, ta, ve databases. |
| e) | Connect all services except Local Computer in services.msc. |
| f) | Set the domain user as an administrator on the local service computer. |
| g) | ODBC connection to MSSQL. |
3. Setting the database
| a) | Run SQL Server Configuration Manager and click Client Protocol under SQL Native Client Configuration. |
| b) | Select TCP/IP and check the default port. |
| c) | Click Protocols for SQLEXPRESS under SQL Server Network Configuration. |
| d) | Make sure that the ODBC port is set to the same as the default port in TCP/IP. |
| e) | Log in to SQL Server Management Studio by an administrator account. |
| f) | Click Security> Logins and then double-click NT AUTHORITY\SYSTEM. |
| g) | Click Server Roles in the Select a page. |
| h) | Select public, sysadmin, and then click OK. |
| i) | Click User Mapping in the Select a page. |
| j) | Select the ac, master, ta, and ve databases and click OK to save. |
|
| 1) | Double-click the downloaded setup program. (ex. 'BioStar 2 Setup.x.x.x.xxx.exe') |
| 2) | Select a language and click OK.
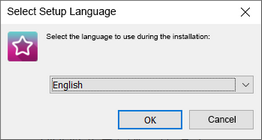 |
| 3) | To continue the installation, select I accept the agreement and click Next.
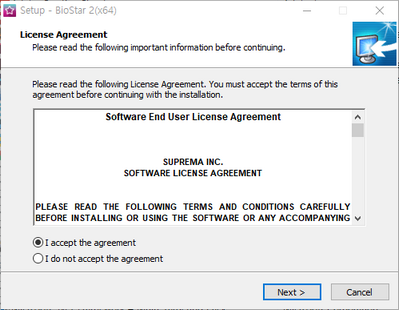
|
| 4) | Enter the password for admin account and click Next. The password set in this step will be used when you log in to BioStar 2.
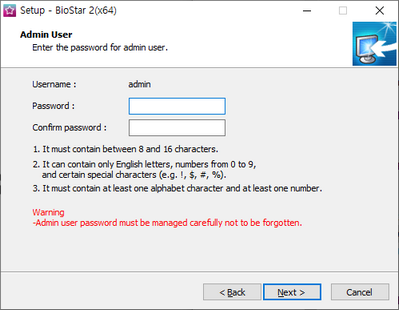 |
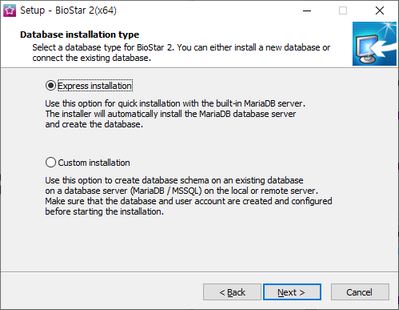
| 5) | Install the database to be used in BioStar 2. You can install a new MariaDB or connect it to the already-installed MariaDB. Installing BioStar 2 for the first time, please select Express Installation and click Next.
|
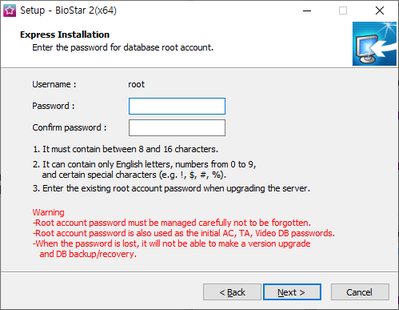
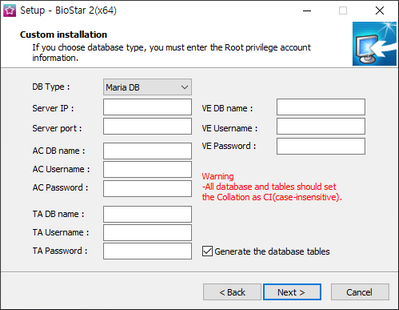
| 6) | If Express Installation has been selected from Database Installation Type, enter the database manager’s account password and click Next. If Custom Installation has been selected from Database Installation Type, enter the detailed information on the already-configured database and click Next.
|
Note
| ▪ | BioStar 2 supports the following databases.
- MariaDB 10.1.10
- MS SQL Server 2012 SP3
- MS SQL Server 2014 SP2
- MS SQL Server 2016 SP1
- MS SQL Server 2017
- MS SQL Server 2019 |
| ▪ | If the database table creation fails when MS SQL Server is set as the Database Type, you can create the table by executing the script in C:\Program Files\BioStar 2 (x64)\dbscript\mssql folder. |
| ▪ | When installing with custom settings, AC DB name, TA DB name, and VE DB name cannot be set the same. |
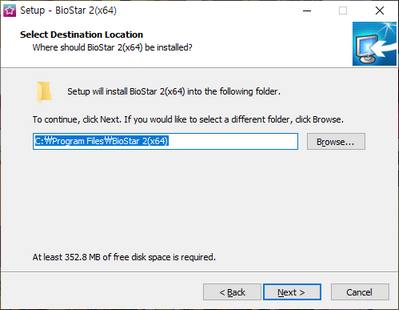
| 7) | Click Next after setting a path for BioStar 2 to be installed.
|
| 8) | Click Next after setting a path for the encryption key to be stored.
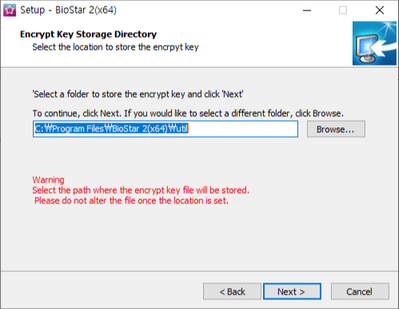 |
Note
| ▪ | You can set a path for the encryption key to be stored. However, if the encryption key file is modified or moved after selecting the path, a system error may occur. |
| ▪ | If you delete BioStar 2, the encryption key files will be deleted. |
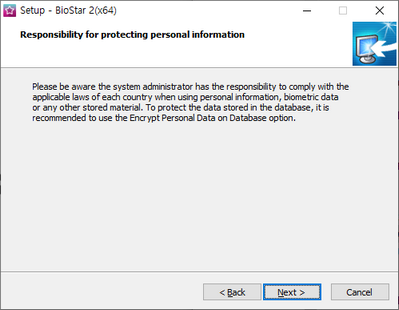
| 9) | Read the instructions on the responsibility for protecting personal information stored in the database and click Next to continue the installation.
 |
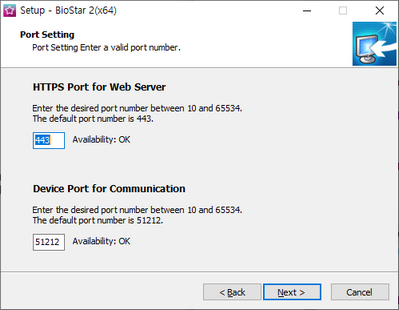
| 10) | Enter the port number and click Next.
|
Note
| ▪ | When you install BioStar 2 on a PC where BioStar 1 is installed, the device port (51212) is not available. In this case, we recommend that uninstall BioStar 1. |
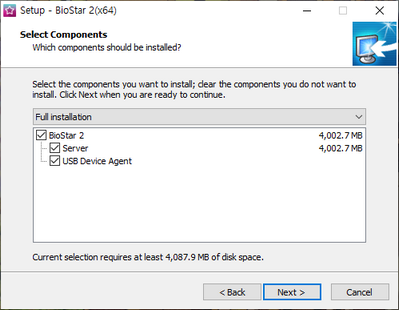
| 9) | Select a component of BioStar 2 and click Next. If you select USB Device Agent, a USB-Agent and a driver for using BioMini, BIoMini Plus 2, and DUALi DE-620 will be installed together.
|
| 10) | If ready to install, click Install.
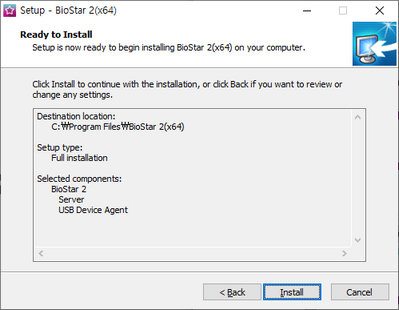
|
| 11) | Select whether to install additional program and click Finish. Follow on screen instructions to complete.
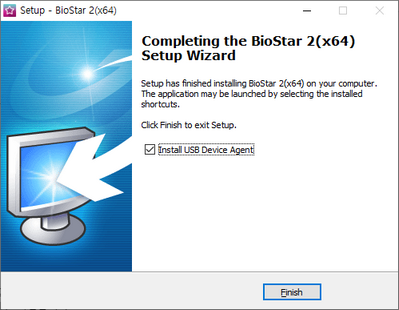 |
Note
| ▪ | The USB Device Agent Certificate provided can be applied to a local network only. |
| ▪ | When another program uses port 443, BioStar-Setting program will be launched automatically and then you can change the port number. For more information, see Changing port of BioStar 2. |
