Editing IP Camera Settings

Contents
You can set the time interval to capture a video log or an image log and link the door and event type to the IP camera.
| 1) | In the camera list, click a camera to edit. |
| 2) | Edit the necessary items. |
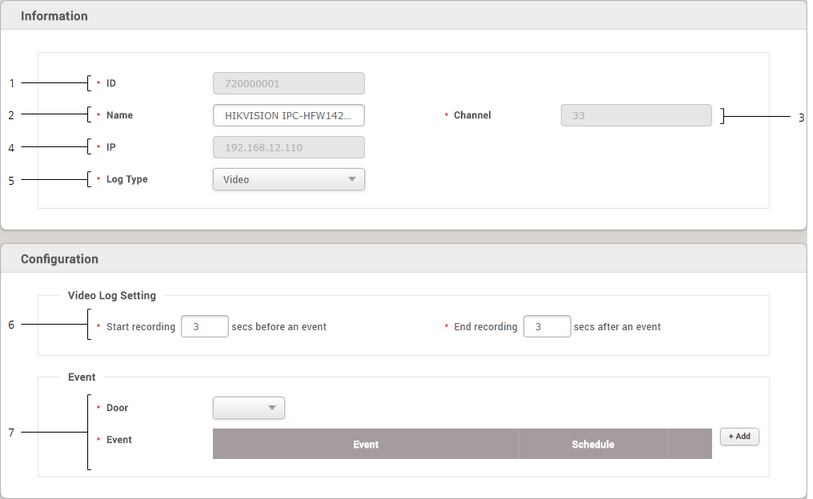
No. |
Item |
Description |
||||||||||
|---|---|---|---|---|---|---|---|---|---|---|---|---|
1 |
ID |
You can view the camera ID. |
||||||||||
2 |
Name |
You can change the camera name. |
||||||||||
3 |
Channel |
You can view the camera channel. |
||||||||||
4 |
IP |
You can view the IP address of the camera. |
||||||||||
5 |
Log Type |
You can set the log type to be captured by the camera.
|
||||||||||
6 |
Video Log Setting / |
You can set the time to capture a video log or an image log.
When Log Type is set to Video
When Log Type is set to Image
|
||||||||||
7 |
Event |
Select a pre-registered entrance door. Click + Add and set a desired event and schedule.
|
| 3) | Click Apply to save the changes. |