Set a schedule to automatically generate custom reports created by setting the DYNAMIC period.
Biostar 2 Admin Login is required to use Automatic Report Schedule. For more information, refer to Biostar 2 Admin Login.
| 2) | Edit the necessary items. |
|
|
|
|
1
|
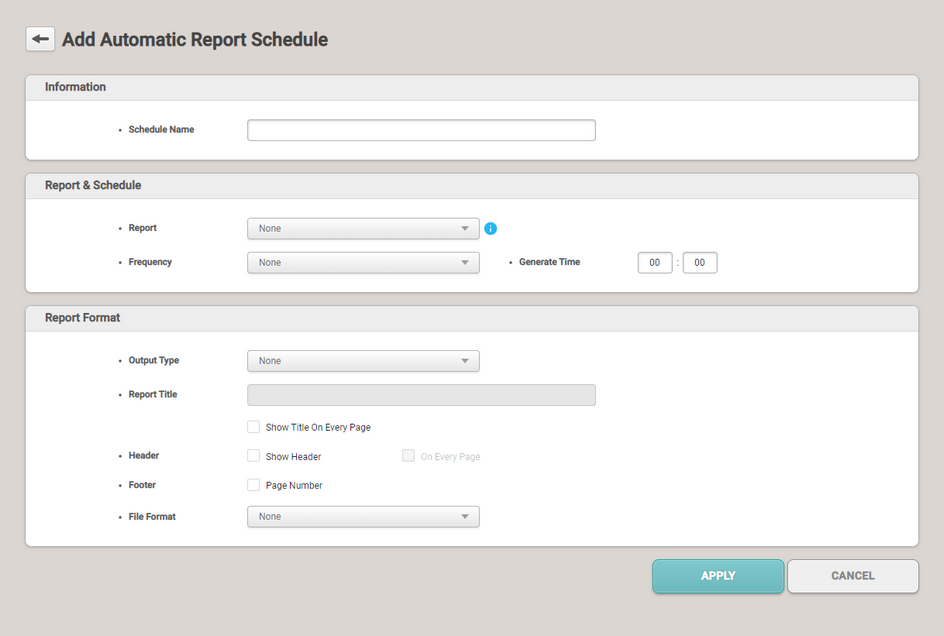
Information
|
Set basic information of Automatic Report Schedule.
| ▪ | Schedule Name: Enter the schedule name. |
|
2
|
Report & Schedule
|
Set the schedule to be automatically generated for each report.
| ▪ | Report: Select a custom report to automatically generate. Only custom reports set to DYNAMIC period will appear. |
| ▪ | Frequency: Set the frequency to automatically generate reports. |
| ▪ | Generate Time: Set the time to automatically generate reports. |
|
3
|
Report Format
|
Set the format for each report.
| ▪ | Output Type: Set the automatically generate method of reports. |
| ▪ | Report Title: Select Show Title On Every Page to display the report name as the title on every page. |
| ▪ | Header: If Show Header is selected, the header is displayed when the report is created. Select On Every Page to display the header on every page. |
 Note Note
| ▪ | The header may vary depending on the reports. |
| ▪ | Footer: Set whether to display page numbers. |
| ▪ | File Format: Set the file format for exporting reports. |
|
| 3) | Click APPLY to save the settings. |
